
Ever looked at a photo and thought, “If only this person could say something”? Maybe you want to make a talking avatar for social media, turn a portrait into a funny video, or give your favorite character a voice.
Good news: you no longer need a film crew, expensive animation software, or the patience of a medieval monk.
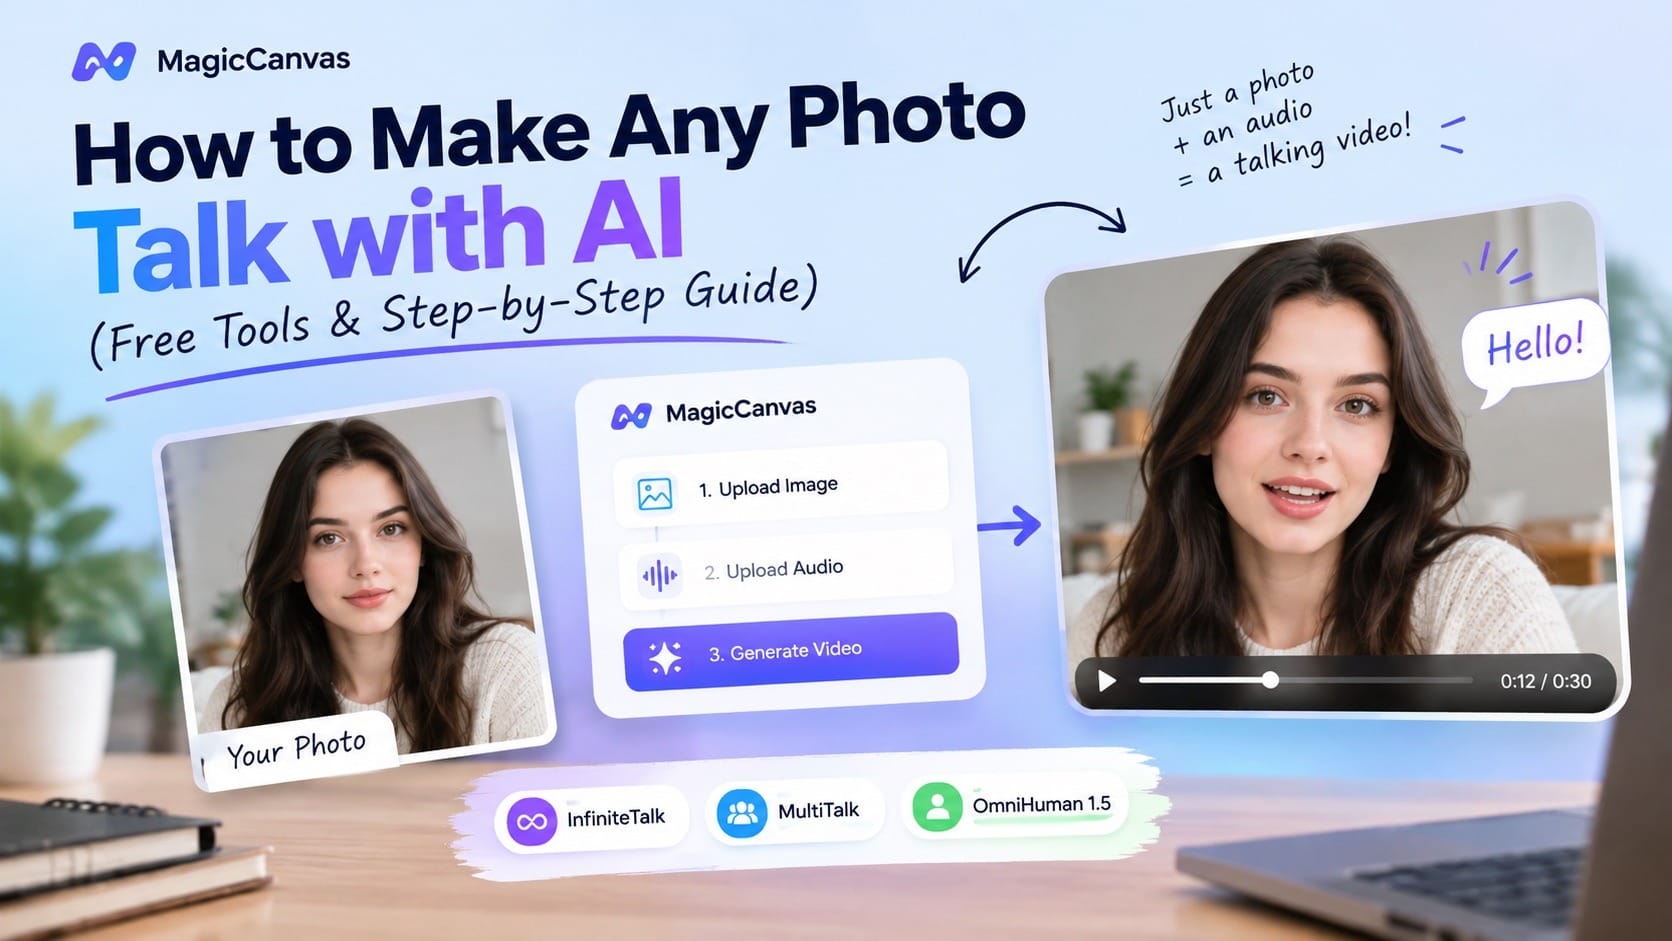
With AI talking photo tools, you can upload a picture, add an audio file, and turn a still image into a video of a person speaking. The AI generates matching mouth movements and brings the image to life. On the right platform, the process can take just a few minutes.
In this guide, we'll explain how AI talking photos work, how to create one step by step, how to get better results, and which tools are worth trying. We'll also show you how to do it with MagicCanvas, where you can choose from three models: InfiniteTalk, MultiTalk, and OmniHuman 1.5.
Ready to give that photo something to say? Let's get started.
What Is an AI Talking Photo?
An AI talking photo is a still image turned into a video in which the person or character appears to speak, sing, or perform along with an audio track.
Instead of manually animating every frame, you provide two basic ingredients:
- A photo: The person, character, or avatar you want to animate.
- An audio file: The voice recording, narration, or other audio that drives the video.
The AI analyzes the audio and generates corresponding lip movements and facial animation. Depending on the model and input, it may also generate head movements, expressions, and other motion.
Think of it as giving a photograph a tiny acting career. You provide the face and the soundtrack; the AI handles the performance.
AI talking photo videos are useful for:
- Social media content: Create entertaining talking portraits for TikTok, Instagram Reels, and YouTube Shorts.
- Educational videos: Turn a portrait into a virtual presenter for short lessons or explanations.
- Marketing content: Make a spokesperson-style video without filming a new take every time.
- Character storytelling: Give original characters a voice and bring illustrated personalities to life.
- Personal projects: Make a birthday greeting, a creative message, or a funny video for friends.
Of course, the final result depends on the image, audio, and model. AI is clever, but it hasn't yet developed the ability to rescue every blurry selfie from its questionable past.
How to Make a Photo Talk with AI: Step by Step
You don't need animation experience or a computer science degree. If you can upload a photo and select a file, you're already most of the way there.
Step 1: Choose a Good Photo
Start with the image you want to animate. This could be a selfie, a professional portrait, an original character illustration, or another image you have permission to use.
For the best chance of getting a natural-looking result, choose a photo with:
- A clearly visible face: The AI needs to see the mouth and facial features.
- Good lighting: Avoid images where half the face disappears into shadow.
- A relatively clear angle: A front-facing or slightly angled portrait is a good starting point.
- Enough detail: Extremely small, blurry, or heavily compressed images may produce less convincing results.
- An unobstructed mouth: Hands, masks, or other objects covering the mouth can make animation harder.
You don't necessarily need a professional headshot. A well-lit phone photo can work just fine.
One practical tip: if your goal is a talking-head video, start with a close-up or medium portrait rather than a full-body image where the face occupies approximately three pixels. Give the AI something useful to work with.
Step 2: Prepare Your Audio
Next, choose the audio that your photo will speak along with.
You could use a voice recording, a short narration, a prepared dialogue, or another audio track supported by your chosen tool. Check the platform's supported file formats before uploading.
For a smoother result, keep these tips in mind:
- Use clear audio. Heavy background noise can make the final result less polished.
- Speak at a natural pace. Extremely fast speech can be harder to follow visually.
- Match the mood to the content. A cheerful greeting and a dramatic monologue call for different kinds of delivery.
- Trim unnecessary silence. Long pauses at the beginning or end can make the video feel less intentional.
- Start with a short clip. A brief test is a convenient way to check whether the photo and audio work well together.
You don't need to record in a professional studio. A quiet room and a decent microphone—or a phone—can be enough for a simple project.
And yes, you can use your own voice. That means you can finally make your imaginary spokesperson deliver the presentation you don't feel like giving yourself.
Just make sure you have the necessary rights to the audio, especially if it includes someone else's voice or copyrighted material.
Step 3: Upload Your Photo and Audio to MagicCanvas
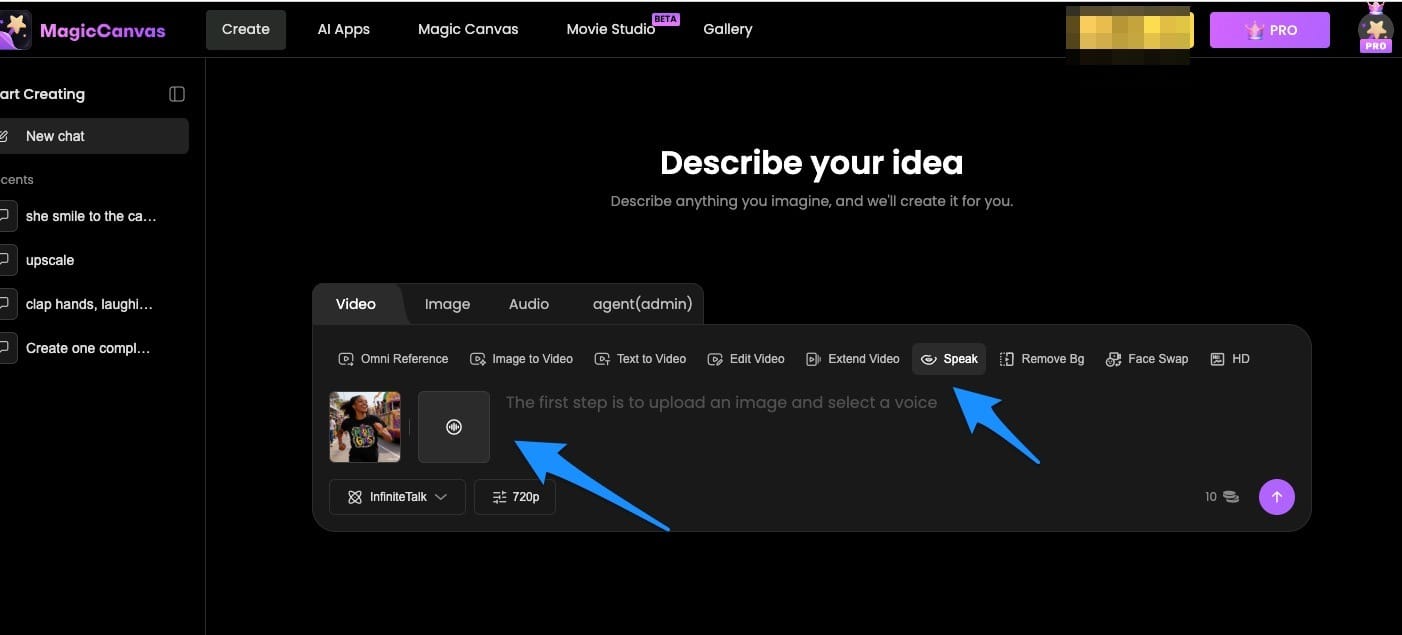
If you'd rather skip complicated animation workflows, MagicCanvas offers a straightforward way to create an AI talking video.
The basic process is simple: upload your image, upload your audio, choose a model, and generate the video.
You don't have to manually animate the mouth, adjust every facial movement, or build a timeline from scratch. MagicCanvas uses the uploaded audio to generate a corresponding video from your image.
Here's the general workflow:
- Open MagicCanvas and navigate to its AI lip-sync or talking-video feature.
- Upload the photo you want to animate.
- Upload your audio file.
- Select one of the available models.
- Start generation and wait for the result.
Within a few minutes, you can have a generated video ready to review, depending on the audio length, model, and processing conditions.
That's the appealing part: two files in, a talking video out. No elaborate production setup required.
Step 4: Which MagicCanvas Model Should You Choose?
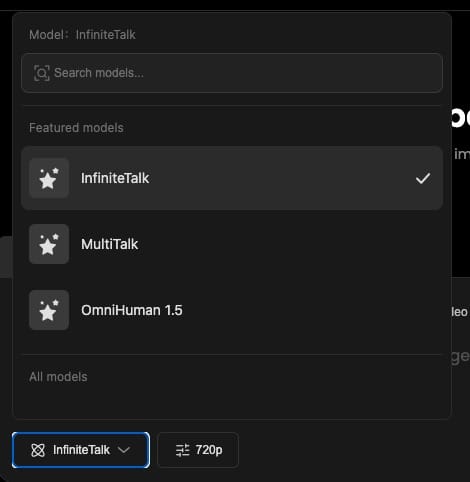
MagicCanvas provides three models for this workflow:
- InfiniteTalk
- MultiTalk
- OmniHuman 1.5
If you're wondering which one to use first, here's our practical recommendation: start with InfiniteTalk.
For the basic task of uploading one image and one audio file to generate a talking video, the three options may overlap in their intended use. You don't need to spend half an afternoon comparing model names before making your first video.
Start with InfiniteTalk, review the output, and decide whether it meets your needs. If you're experimenting with a particular style or workflow, you can try another model and compare the results using the same inputs.
A simple comparison is often more useful than choosing based on a model name alone.
| Model | What to know | Our suggestion |
|---|---|---|
| InfiniteTalk | An available option for image-and-audio-driven talking videos | Try this first for a straightforward workflow |
| MultiTalk | Another model available in MagicCanvas | Try it if you want to compare outputs |
| OmniHuman 1.5 | A third model option for generating talking videos | Explore it if you're curious about the alternatives |
We're not claiming that one model wins every possible test. Results can vary depending on the input image, audio, and generation settings. The easiest way to find your preferred option is to test them on the same photo and audio clip.
For most beginners, however, the best starting point is the one that gets them creating instead of endlessly browsing settings. That's why InfiniteTalk gets our first recommendation here.
Step 5: Generate, Review, and Download Your Video
Once you've uploaded your files and selected a model, start generating your video.
When the result is ready, watch it from beginning to end. Don't just inspect the first two seconds and declare victory. The mouth movement might look great at the start but become less convincing during a long or complicated sentence.
Check for:
- Whether the mouth movements generally match the audio.
- Whether facial expressions look reasonably natural.
- Whether the face remains recognizable throughout the clip.
- Whether any movements look distracting or unexpected.
- Whether the video begins and ends at the right moments.
If you're happy with the result, export or download it using the options available in the platform.
If something looks off, don't immediately blame the AI—or your photo's entire family tree. Try a clearer image, cleaner audio, or a shorter clip. Small changes to the inputs can make a meaningful difference.
How to Get More Natural-Looking AI Talking Videos
Uploading a photo and audio file is easy. Getting a result that feels natural takes a little more care.
Here are some practical tips that can help.
Use a Photo with a Clearly Visible Face
The face is the main reference for a talking-photo workflow. If the subject is facing away from the camera, wearing oversized sunglasses, or hidden behind a giant coffee mug, the AI has less visual information to work with.
A clear portrait is usually a better starting point than a complicated scene.
Make Sure the Audio Is Clean
Audio quality matters because it drives the performance. If the recording contains lots of background noise, overlapping voices, or distorted speech, the result may feel less polished.
Whenever possible, use a clean recording with one clear speaker. If you are recording the audio yourself, test the microphone before recording the entire script.
Match the Length to Your Goal
For your first experiment, choose a short audio clip. It is easier to review, faster to iterate on, and less frustrating if you decide to change the image.
Once you're happy with the result, you can move on to longer content if your chosen model and platform settings support it.
Choose Audio That Fits the Character
A dramatic voice recording paired with a smiling vacation selfie can create an interesting contrast. Sometimes that's exactly what makes a video funny.
But if you're aiming for realism, consider whether the image and audio feel like they belong together. A calm portrait with a relaxed voice may feel more natural than a high-energy recording paired with a solemn expression.
Don't Expect Every Frame to Be Perfect
AI-generated video can occasionally produce awkward expressions, unusual movements, or imperfect lip synchronization. That doesn't necessarily mean the entire project is unusable.
Review the output carefully. If the issue is distracting, try a different image or audio clip and generate another version.
A little iteration is normal. Even human actors need more than one take sometimes—and they don't have to worry about being rendered with three eyebrows.
Free AI Talking Photo Tools: What Should You Look For?
If you're searching for a free AI talking photo generator, don't judge a tool by the word free in its headline alone. Check what you can actually do without paying.
Before committing to a tool, look at these details:
1. Free credits or trial access
Some platforms provide trial credits or limited free generations. Others may let you preview results but require payment to export them. Check the current plan details before starting a project.
2. Watermarks
A free export may include a watermark. That might be fine for a personal experiment, but less ideal for a professional presentation or branded video.
3. Video length and output quality
Some tools limit the length, resolution, or number of generations available to free users. Make sure the limits fit your project.
4. Supported uploads
Confirm that the tool accepts your image and audio formats. You don't want to spend twenty minutes preparing a file only to discover that it isn't supported.
5. Privacy and usage rights
Read the platform's policies before uploading sensitive images or voice recordings. If the photo or voice belongs to someone else, make sure you have permission to use it.
MagicCanvas is worth considering if you want a simple image-plus-audio workflow and the flexibility to choose among InfiniteTalk, MultiTalk, and OmniHuman 1.5. Check its current plan and credit information to determine which options are available to you.
The key is to compare what each tool actually provides, rather than assuming that every feature is free just because the landing page says so.
Common Questions About AI Talking Photos
Can I make a photo talk for free?
Potentially, yes. Some tools offer free trials or credits, while others restrict exports, resolution, or generation length. Check the current pricing and usage limits of the tool you choose.
Do I need to record a video first?
No. For the image-and-audio workflow described in this guide, you start with a still image and an audio file. The AI generates the corresponding video.
Can I use my own voice recording?
Yes, provided your chosen tool supports the audio file and format. A clear recording of your own voice is a useful starting point.
How long does it take to generate a talking photo?
On a suitable platform, generation can take only a few minutes. Actual processing time varies with audio length, model, server load, and settings.
Which MagicCanvas model should I try first?
We recommend starting with InfiniteTalk for a straightforward image-and-audio talking-video workflow. MagicCanvas also offers MultiTalk and OmniHuman 1.5, so you can compare them if you want to explore the alternatives.
Can I use an AI talking photo video for commercial content?
That depends on the tool's terms and the rights associated with your inputs. Before using a generated video in an advertisement, client project, or monetized channel, check the platform's licensing terms and make sure you have permission to use the image and audio.
Final Thoughts: Give Your Photos Something to Say
Making a photo talk with AI doesn't have to be complicated. Choose a clear image, prepare a clean audio file, upload both to a suitable tool, and let the AI generate the video.
If you want a straightforward place to start, try MagicCanvas and select InfiniteTalk. You can upload your image and audio, generate a video within a few minutes under suitable processing conditions, and explore MultiTalk or OmniHuman 1.5 whenever you feel like comparing the results.
Whether you're making a funny social post, a virtual presenter, a character video, or a creative personal project, the process is accessible even if you've never edited a video before.
Ready to bring a photo to life? Try MagicCanvas and see what your image has to say.
One last reminder: use images and audio you own or have permission to use, particularly when creating content that depicts real people.