
Got a story idea that would make a great short film? Maybe it's about a detective who discovers a secret hidden in an old photograph, a fantasy city floating above the clouds, or two strangers who keep meeting in the strangest places.
There's just one problem: turning that idea into a video can mean dealing with scripts, actors, locations, cameras, and editing software. Suddenly, your little creative project feels suspiciously like a second job.
That's where AI story videos come in.
With AI video generation tools, you can turn written ideas into visual scenes, animate still images, and experiment with different cinematic styles without organizing an entire film crew. You still need a good story and a little creative direction, but the production process can be much more accessible.
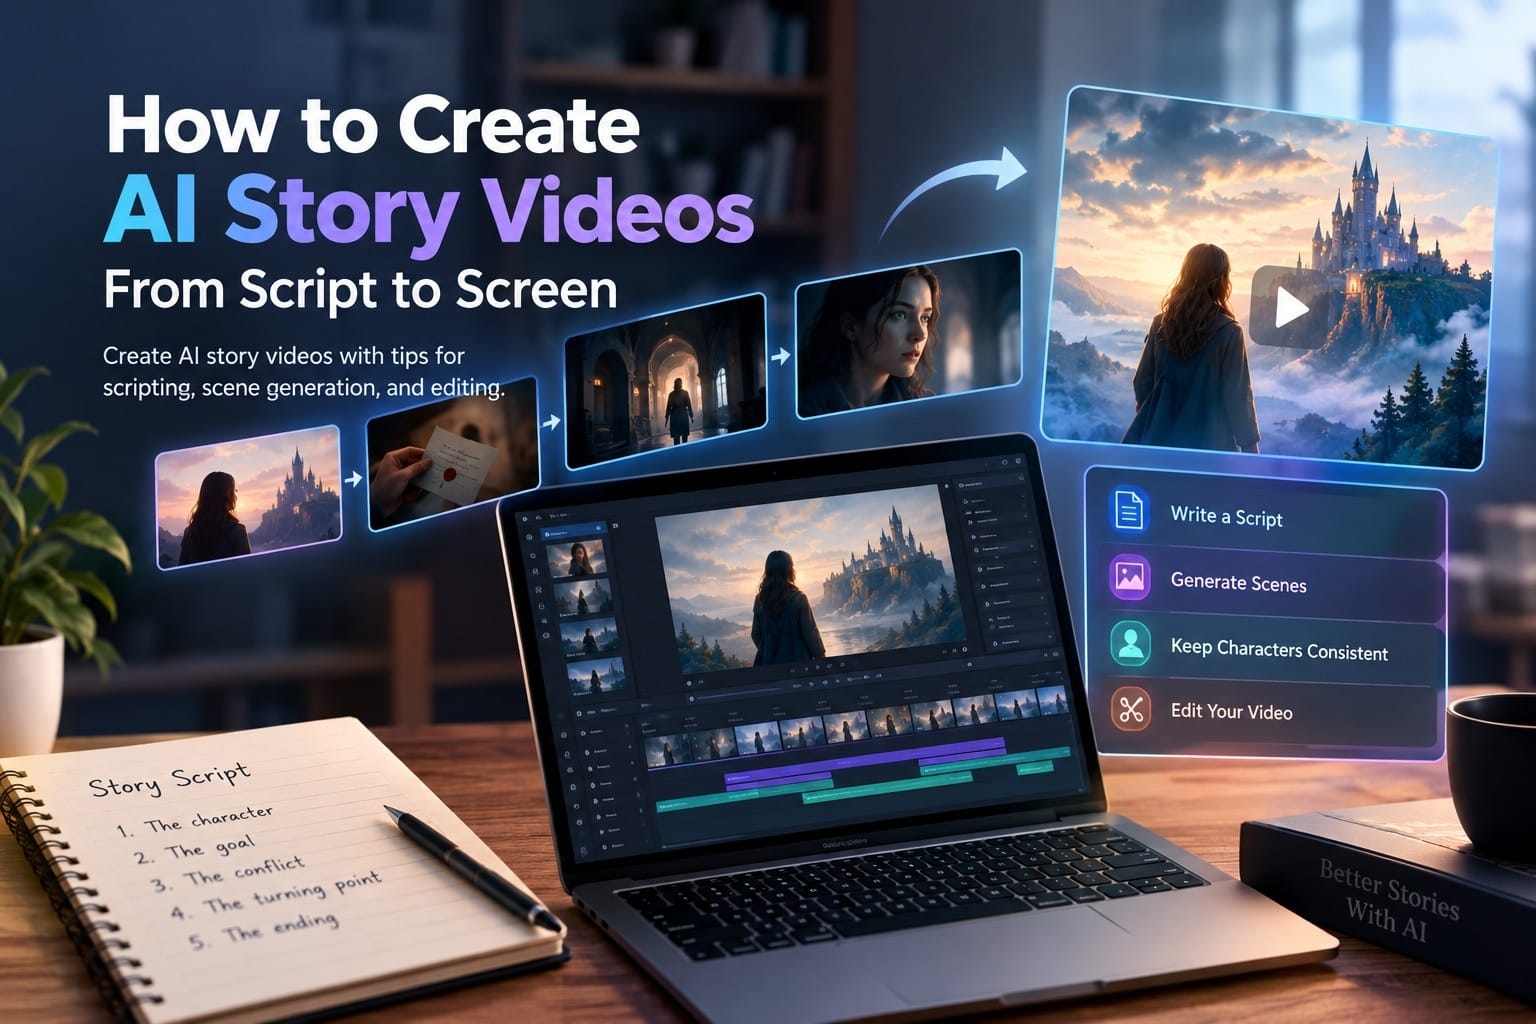
In this guide, we'll walk through how to create AI story videos from script to screen. You'll learn how to develop a story, write prompts, generate scenes, keep characters consistent, and edit everything into a video people actually want to watch.
We'll also explore how MagicCanvas can help you turn creative ideas into video clips using text prompts and reference images.
What Is an AI Story Video?
An AI story video uses artificial intelligence to help transform a narrative into moving images. Depending on your workflow, you can start with a written script, a text prompt, reference images, or a combination of these elements.
Imagine you're making a short mystery about a woman who receives a letter from someone who disappeared twenty years ago.
You could generate a cinematic shot of her sitting beside a rainy window, create a close-up of the mysterious letter, and produce another scene showing her walking toward an abandoned house. Then, you can arrange those clips into a sequence that reveals the story.
Instead of filming every shot yourself, you generate the visuals and focus on making the narrative work.
AI story videos are useful for:
- Short films and cinematic storytelling
- Fantasy, sci-fi, and horror stories
- YouTube storytelling videos
- TikTok, Instagram Reels, and YouTube Shorts
- Animated-style narratives
- Visual experiments and concept trailers
- Creative projects that would otherwise require expensive locations or sets
One important distinction: a collection of beautiful AI clips isn't automatically a story. You still need characters, motivation, conflict, and some kind of resolution. Otherwise, you've made a very impressive screensaver.
The goal is to use AI to tell a story, not simply generate random cinematic shots.
Step 1: Start With a Simple Story Idea
Before opening an AI video generator, figure out what your video is actually about.
You don't need a screenplay worthy of Hollywood. For your first project, a 30–60 second story with five to eight scenes is a much more manageable starting point than a feature-length fantasy epic.
A simple story structure works well:
- Beginning: Introduce the character and their situation.
- Middle: Something unexpected happens, creating a problem.
- Ending: The character makes a decision, discovers something, or faces a consequence.
For example:
A night-shift security guard notices that one of the building's cameras shows events that haven't happened yet.
That's a promising premise because it immediately raises questions. What does the camera show? Can the guard change the future? What happens if they ignore the warning?
You don't need to answer every question at once. You just need enough of a story to give your scenes a purpose.
Use a simple story-planning template
Before writing your script, answer these five questions:
- Who is the main character?
- What do they want?
- What's standing in their way?
- What unexpected event changes the situation?
- What should the audience feel or discover at the end?
AI writing assistants can help brainstorm ideas, suggest plot twists, or turn a rough concept into a first draft. Just review the result yourself. AI can produce a perfectly grammatical story in which absolutely nothing interesting happens.
Step 2: Turn Your Idea Into a Video Script
A written story and a video script aren't quite the same thing.
A story can describe what a character remembers, feels, or secretly knows. A video needs to communicate those ideas through visible actions, dialogue, narration, and sound.
Your job is to translate the narrative into scenes that an audience can see and understand.
Let's say your original idea is:
"Maya returns to her childhood home after receiving a strange letter. Inside, she discovers messages that someone has been leaving for her in a locked room."
Instead of treating this as one long scene, break it into smaller moments.
| Scene | What happens | Purpose |
|---|---|---|
| 1 | Maya stands outside an old house at dusk | Establish the setting |
| 2 | She opens a dusty envelope under a dim light | Introduce the mystery |
| 3 | She walks down a dark hallway | Build suspense |
| 4 | She discovers strange writing on a locked door | Reveal a clue |
| 5 | She reaches for the door handle | Create anticipation |
| 6 | The lights suddenly go out | End with a cliffhanger |
Every scene has a job. Even the hallway scene helps build tension before the discovery.
Write for the camera, not just the reader
Avoid relying entirely on abstract emotions.
Instead of writing:
"Maya feels terrified when she discovers the truth."
Try something more visual:
"Maya freezes in the doorway, staring at the writing scratched into the wooden wall. Her hand trembles as she slowly raises a flashlight."
The second description gives the video generator more concrete details to work with.
You can communicate emotion through facial expressions, body language, lighting, dialogue, and music. The key is to translate those emotions into things that can be shown or heard.
Step 3: Plan the Visuals Before Generating Anything
Now that you have a script, decide what each scene should look like.
You don't need to become a professional cinematographer overnight. A basic visual plan can make your final video feel much more intentional.
For each scene, think about five elements:
- Subject: Who or what is visible?
- Action: What happens during the shot?
- Environment: Where does the scene take place?
- Camera: Is it a close-up, wide shot, or tracking shot?
- Style: What lighting, colors, and atmosphere fit the story?
Here's an example prompt:
"A young woman in a dark green coat stands outside an abandoned Victorian house at dusk. Wind moves through the overgrown garden as she slowly approaches the entrance. Wide cinematic shot, subtle camera push-in, cold blue-gray lighting, realistic textures, atmospheric mystery."
This prompt describes the subject, action, environment, camera movement, and visual style without burying the main idea under unnecessary details.
Mix different shot types
If every scene uses the same camera angle, your video can quickly feel repetitive.
Try using:
- Wide shots to establish locations and surroundings.
- Medium shots to show body language and interactions.
- Close-ups to highlight important objects, clues, or expressions.
- Moving shots to follow a character or add energy.
For a mystery story, you might start with a wide shot of an empty house, cut to a medium shot of Maya entering, and then use a close-up of the letter.
These choices help guide the audience's attention and control how information is revealed.
Step 4: Generate Your Scenes With AI
Once your script and shot list are ready, it's time to create the footage.
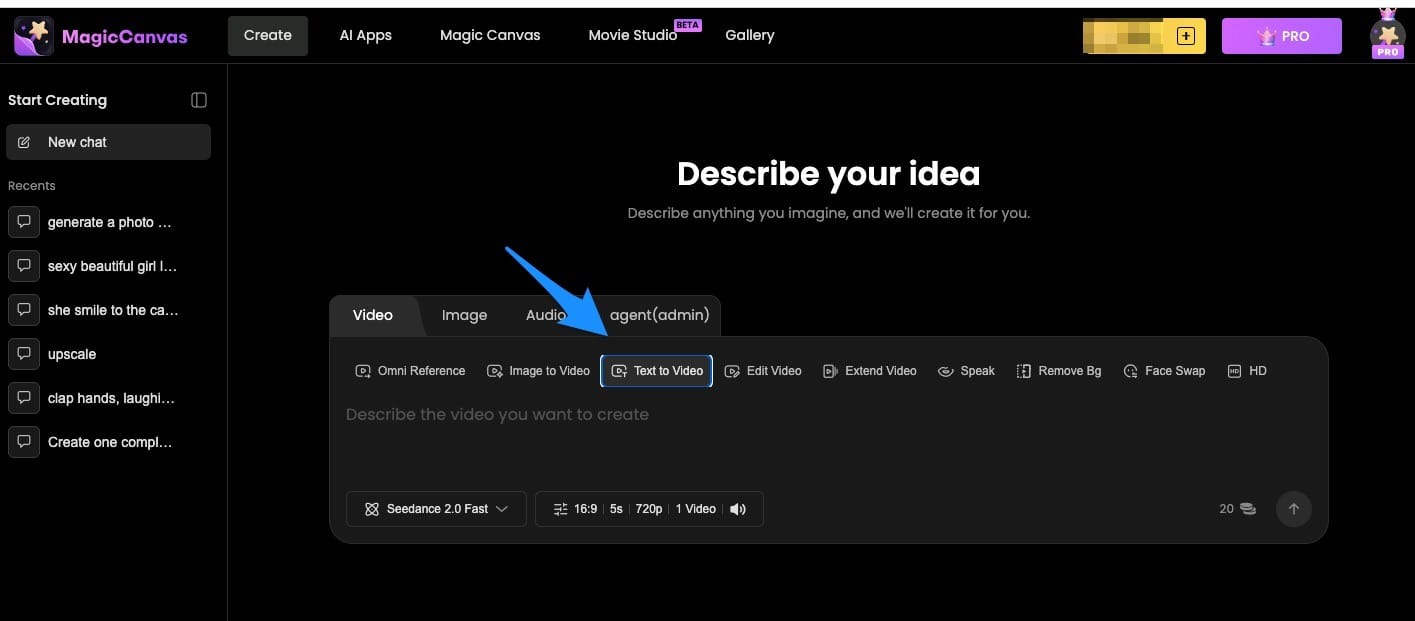
MagicCanvas Text to Video lets you describe a scene in words and generate a video clip from that description. It's a useful starting point when you don't already have an image for the scene you want to create.
Option A: Start with Text to Video
Text to Video works well when you want to generate a new setting, establish an atmosphere, or visualize a scene from scratch.
For example, you could use this prompt:
"A lone detective walks through a deserted train station at midnight. Flickering fluorescent lights reflect on the wet floor. A distant train approaches through the fog. Slow tracking shot, cinematic suspense, realistic lighting, muted colors."
This gives you a starting point for an establishing shot or a moment in a suspense story.
MagicCanvas offers different video models, allowing you to experiment with available options and compare their results. Different models may interpret the same prompt differently, so it's worth testing a few variations before choosing your final clip.
Don't assume your first generation is automatically the best. Look at the composition, movement, and atmosphere. Keep the version that best supports the story.
Option B: Use Image to Video for More Visual Control
Sometimes you already have a character design, illustration, or background that you want to use in your story.
In that case, MagicCanvas Image to Video lets you start with an image and describe the movement you want to add.
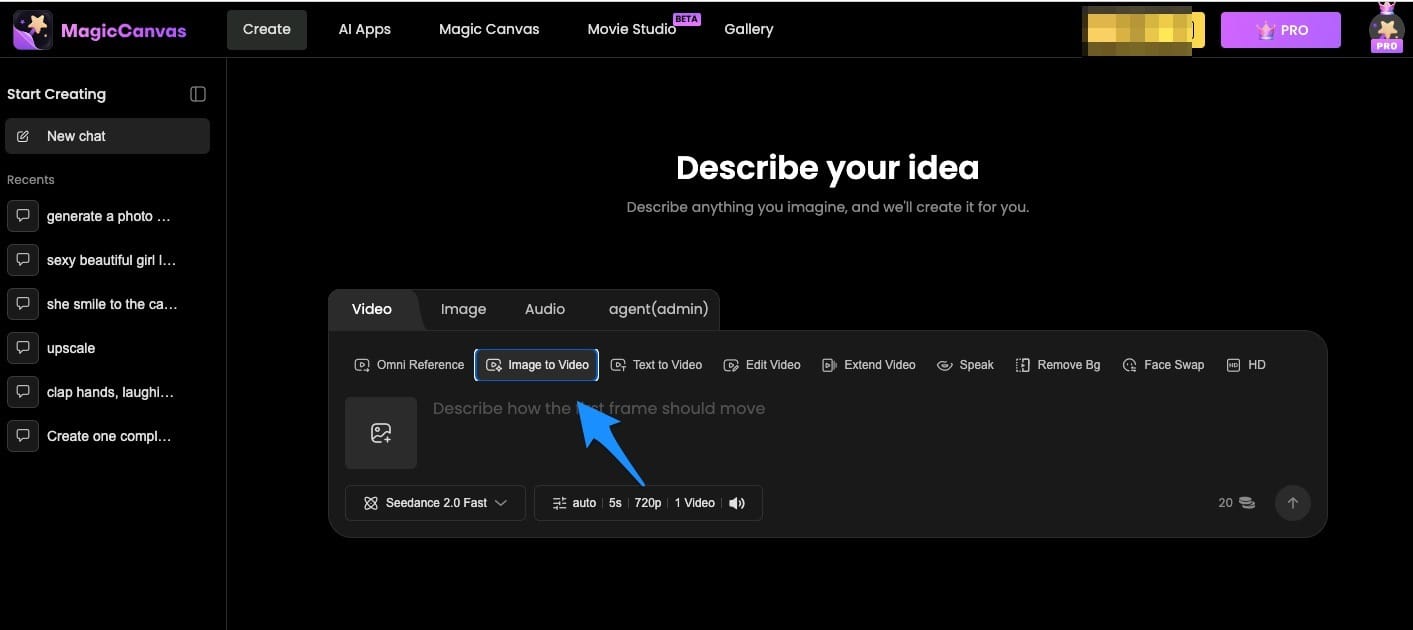
Imagine you've created an illustration of a fantasy princess standing on a castle balcony. You could use it as the starting point for a clip in which her hair moves in the wind, clouds drift behind her, and the camera slowly pushes toward her face.
This approach can be especially useful for character introductions, atmospheric shots, and scenes built around a particular composition.
A few practical tips:
- Start with a clear, high-quality image.
- Describe one main movement at a time.
- Specify whether the camera should stay still or move.
- Avoid combining too many complicated actions in a short clip.
- Review the result for unexpected changes to faces, clothing, or background details.
For example, "the character slowly turns toward the window as the curtains move in the breeze" is easier to interpret than a prompt asking the character to run, dance, turn around, change outfits, and leap onto a dragon in five seconds.
Save the dragon for the next scene.
Which workflow should you choose?
| Your starting point | Best place to start |
|---|---|
| A written idea with no visual assets | Text to Video |
| An existing character image or illustration | Image to Video |
| A scene that needs a different visual direction | Try another prompt or available model |
| Several scenes that need to work together | Plan the sequence first, then generate and edit each shot |
You can combine both approaches in one project. For example, generate an establishing shot from text, then use Image to Video for a character moment based on a reference image.
Step 5: Keep Your Characters and Visual Style Consistent
One of the biggest challenges in AI storytelling is character consistency.
Your protagonist might look perfect in one scene, then mysteriously acquire a different hairstyle, jacket, or face in the next. It's the AI equivalent of hiring the same actor for a movie and discovering that they look like a different cousin every ten minutes.
A little planning can help reduce these inconsistencies.
Create a character reference sheet
Write down the defining features of every main character before generating your scenes.
For example:
Character: Maya
- Age: 28
- Hair: Shoulder-length dark brown hair
- Eyes: Hazel
- Clothing: Dark green coat, black trousers, brown boots
- Distinguishing feature: Small silver necklace
- General appearance: Realistic, understated, slightly tired
Reuse the same core description whenever Maya appears. If your chosen workflow supports reference images, reuse the same approved image whenever possible.
Reference images can help establish a more consistent visual starting point, although they don't guarantee identical results across every scene.
Keep your visual style consistent, too
Decide early whether your story should look photorealistic, animated, illustrated, or like a stylized fantasy film.
For a mystery story, you might choose:
- Cool blue-gray colors
- Soft, low-key lighting
- Slightly desaturated backgrounds
- Slow camera movements
- Realistic environments
The scenes don't have to look identical. They simply need to feel like they belong to the same world.
Keep a copy of your best prompts and approved images. Rebuilding a character from memory after generating six scenes is a surprisingly effective way to waste an afternoon.
Step 6: Add Dialogue, Narration, and Sound
A story video doesn't always need dialogue, but sound can completely change how a scene feels.
A quiet room with distant thunder creates a very different mood from the same room with cheerful background music. The visuals haven't changed, but the emotional context has.
There are three main elements to consider.
Dialogue
Let characters speak when their words reveal personality, move the plot forward, or change a relationship.
Avoid adding dialogue simply because a scene feels empty. Sometimes a pause, a glance, or a sound in the background is more effective than another sentence.
If you want a character to speak on screen, you can explore MagicCanvas Lip Sync for compatible image- or video-based workflows with audio. Check the selected model's input requirements before generating.
Voice-over narration
Narration works particularly well for short stories, mystery videos, and faceless storytelling channels.
For example:
"Maya had lived in that house for seventeen years. She thought she knew every room. Then she found the letter."
A few lines can establish context without requiring a complicated conversation between characters.
You can record your own narration or use an AI voice tool. Choose a voice that matches the story's mood, and leave enough space for the visuals to do their work.
Sound effects and music
Think about the sounds that make a scene believable: footsteps on wooden floors, rain against a window, distant traffic, a creaking door, or a clock ticking in an empty room.
Use music to support the emotional arc rather than drown out the story.
If you plan to publish commercially, check the licensing terms for the music, voices, and sound effects you use.
Step 7: Edit Your Clips Into a Complete Story
Once you've generated your scenes, bring them into a video editor and arrange them in the correct order.
This is where individual clips become a coherent narrative.
A useful structure is:
Hook → Setup → Conflict → Turning Point → Payoff
Your opening should give viewers a reason to keep watching. For a short-form video, you may have only a few seconds to establish that reason.
Instead of opening with a long shot of a character walking through an empty hallway, consider starting with the mysterious event itself, then revealing how the character got there.
Pay attention to pacing
Different scenes need different amounts of screen time.
An establishing shot might need only a few seconds. A crucial discovery may deserve a longer pause so viewers can understand what they're seeing.
Cut a clip when its important action is complete, not simply because you generated a five-second video and feel obligated to use every frame.
You can also use:
- Simple cuts to maintain momentum
- Crossfades for softer transitions
- Captions for important dialogue or narration
- Subtle zooms to emphasize details
- Ambient sound to connect separate scenes
If you're creating content for TikTok, Instagram Reels, or YouTube Shorts, consider a vertical 9:16 format from the beginning. Keep important faces, objects, and text away from areas that platform interfaces may cover.
And don't underestimate the power of deleting a clip you really like. A beautiful shot that doesn't move the story forward may still need to go. Editing is occasionally the art of breaking up with your favorite footage.
Step 8: Review, Refine, and Export
Before publishing, watch your video from beginning to end without stopping.
Look for problems that might not be obvious when reviewing individual clips. Does the character suddenly change appearance? Does the camera movement feel unnatural? Does a scene appear before the audience has enough context to understand it? Does the ending deliver a payoff, or does the story simply stop?
Use this checklist before exporting:
- Story logic: Can viewers understand what happens and why?
- Visual consistency: Do the characters, locations, and colors feel connected?
- Motion quality: Are there distracting distortions or unexpected movements?
- Audio: Is the dialogue clear and the music balanced?
- Pacing: Does every scene contribute something?
- Format: Is the aspect ratio suitable for your intended platform?
- Rights: Do you have permission to use the music, images, voices, and other assets?
You may need to regenerate a scene, shorten a transition, or rewrite a line of narration. That's normal. AI can speed up parts of production, but it doesn't eliminate the need for creative decisions.
Finally, export your video at a resolution and frame rate suitable for your chosen platform. Watch the exported file one more time before uploading it.
Common Mistakes to Avoid When Creating AI Story Videos
Even with a good workflow, a few common mistakes can make your first project harder than it needs to be.
Making the story too ambitious. Start with a small narrative instead of a fantasy epic with twelve kingdoms and a complicated family tree.
Writing vague prompts. Describe visible actions, important details, and the intended atmosphere rather than relying on abstract instructions.
Changing character descriptions in every scene. Reuse your character notes and reference images where available.
Asking for too much movement at once. Complex actions, moving cameras, and several interacting subjects can make generation more difficult. Simplify the shot if the results aren't working.
Skipping the editing stage. A folder full of AI clips is raw material, not a finished story.
Expecting every generation to be perfect. Compare variations, keep the strongest results, and revise scenes that distract from the narrative.
Forgetting the audience. Impressive visuals are great, but viewers still need a reason to care about what happens next.
Final Thoughts: Turn Your Next Story Into a Video
Creating AI story videos becomes much easier when you treat it as a storytelling process rather than a single prompt-writing exercise.
Start with a simple idea. Turn it into a short script. Break the script into visual scenes. Generate those scenes with Text to Video or Image to Video, refine your character references, add sound, and edit everything into a clear narrative.
Tools like MagicCanvas can help you experiment with visual ideas and turn descriptions or reference images into video clips without filming every scene yourself.
You don't need a massive budget or a professional film crew to get started. You need a story worth telling, a clear visual plan, and the patience to improve a few scenes along the way.
So start small. Make a 30-second mystery, a tiny fantasy adventure, or a dramatic story about the last slice of pizza in the refrigerator.
Who knows? Your first AI story video might be the beginning of something much bigger.
And if nothing else, you'll finally have a legitimate excuse to spend an afternoon deciding whether the lighting in a fictional abandoned mansion should be slightly more ominous.